User Authentication With Mongoose, Bcrypt, Jwt And Node Js
A tutorial on how to authenticate users using node js, express, mongoose, json web token, bcryptjs and your computer.


Hello, this tutorial is going to show you one of the many ways to authenticate users, and at the end of this walk through, I will be showing us how to use our authentication code as a template repository on github.
Setting up the project
Checking if node is installed on your computer
Firstly lets check if we have a supported version of node js installed on our computer
by typing node -v in your command line
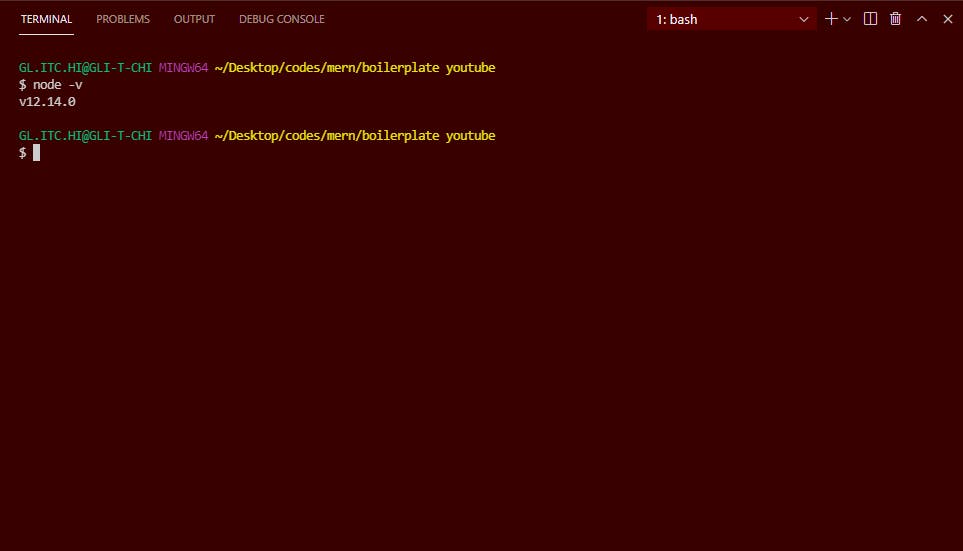 I have version 12 installed on computer
NOTE: my terminal is red because I use vs code
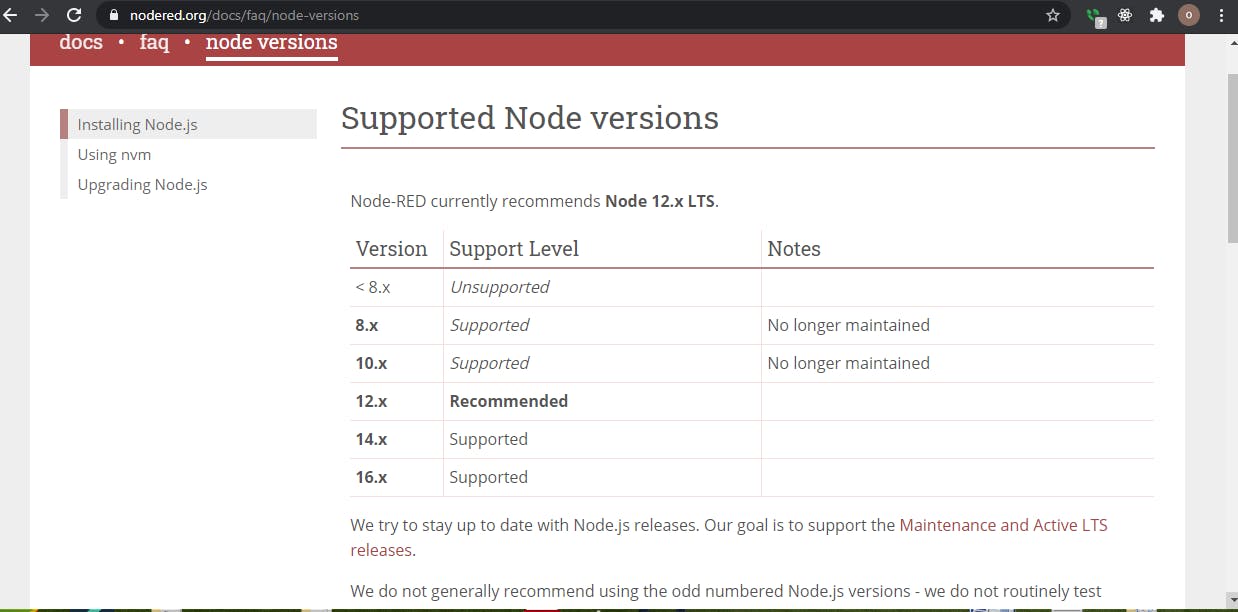
if you have any of the supported versions on your computer you are good to go.
Initializing the project
Create a new folder on your machine with the name nodeauthserver or any name of your choosing.
Navigate to that directory from your command line.
NOTE: if you are not sure how to do that just google this keywords ( how to navigate to a directory in terminal ) and you should find a solution for your computer.
Now lets set up npm by running this in the command line
npm init -y
to create a package.json file with the default configurations.
Next, lets install the necessary dependencies for our application by running this in our command line
npm install bcryptjs express mongoose jsonwebtoken cors cookie-parser
before we move on, let's configure our start script by checking our package.json file's scripts and adding this line "start" : "node index.js" to the scripts and deleting the test script as we will not be writing tests in this tutorial.
So your scripts should now look like this:
"scripts" : {
    "start" : "node index.js"
  }
Setting up our server
In our start script we made reference to an index.js file as our entry point which was not in existence. Let's change that by creating an index.js file in the root directory.
In our index.js file input the following:
// import express and mongoose
const express = require("express");
const mongoose = require("mongoose");

// creates an instance of the express app and save in the app constant
const app = express();

// sets the port to the environment variable PORT but if the variable is not set we use 5000
const port = process.env.PORT || 5000;

// middleware that parses json
app.use(express.json());

// a route to / that returns an object
app.get("/", (req, res) => {
  return res.send({ message: "an auth app " });
});


// listen for requests made to our server on the specified port
app.listen(port, () => {
  console.log(`app listening on port ${port}`);
});
now, lets test our server by running our start script in the command line
npm start
you should see app listening on port in the command line if everything works out as it should.
NOTE: you would have to kill the process ( by pressing ctrl c on a windows computer ) and restart it every time a change is made to your server. To prevent this, kill the process and install nodemon on your computer, by running this in your command line npm install -g nodemon. If it is installed you can now start your server by typing nodemon index.js in the command line.
Setting up and connecting to mongodb
For this project we will be working with mongodb atlas.
NOTE: mongodb atlas is a cloud hosted mongo db database i.e, your data is stored on another computer, in another location, but can be accessed by you anytime you require it.
Go to mongodb's website , sign in if you already have an account. If you don't click on the start free button to sign up
If you are entirely new to mongodb atlas, I would advise you to go through the tutorial on the documentation here and for the code example look at the Node.js driver examples.
Make sure to copy the password you create for the database user into any file of choice, it would be used to connect to the database we create.
creating a new database for our application
To create a new database we need to first sign-in, after you sign-in follow the following steps to create a new database : p.s if you know how to create a new database do go ahead and do that, you can skip this step
- click on collections
- click on the create new database button
- enter the name of the database
- enter the name of the collection which in this case would be the user
- click on the create database button
- click on overview on the menu
- click on the connect button
- click on connect your application
- copy the connection string into any file of choice, as we will use it later to connect to our database
connecting to our database using mongoose
Mongoose is an Object Data Modeling (ODM) library for MongoDB and Node.js. It enables us create schemas, define relationships between documents and it serves as an intermidiary between Node js and Mongodb. We will be using it instead of mongoDB's native driver.
Before we continue, In your connection uri make sure to replace the placeholders for the database name and the database user password with the correct data.
In order to connect we will be needing to add the following lines to our already existing code in index.js
 mongoose.connect(
   "connection uri",
   {
     useNewUrlParser: true,
     useFindAndModify: true,
     useCreateIndex: true,
     useUnifiedTopology: true,
   },
  (err, something) => {
   if (err) {
       console.log(err);
     }
}
);
the mongoose.conect( ) is a method that allows us connect to mongoDB using the connection uri which it accepts as one of it's parameters along with an options object which is important for using mongoose.
Now let's setup an event listener for when our connection is open
mongoose.connection.on("open", (err) => {
  if (err) {
     console.log(err);
   } else {
        console.log("connected to database");
  }
 });
When we are successfully connected to the our cloud database, connected to database is logged in our console.
Creating authentication routes
In our root folder create a new folder called routes , it would house all of our routes. Now we would create a new file auth.js in our newly created routes and paste in the following code
const express = require("express");


//creating a new router object from the express global object via the Router method
const router = express.Router();

// route to sign up  that is, it would handle requests to this route that end in /signin
router.post("/signup", (req, res) => {
  const { email, password } = req.body;
  if (!email.trim() || !name.trim() || !password.trim()) {
    return res.send("fill in correct details");
  }
  return res.send("signed up");
});

//route to sign in that is, it would handle requests to this route that end in /signin
router.post("/signin", (req, res) => {
  const { email, password } = req.body;
if (!email.trim() || !password.trim()) {
    return res.send("fill in correct details");
  }
  return res.send("signed in");
});

module.exports = router;
this code will serve as boiler plate for the signin and signup routes.
What we did there was create routes through HTTP methods and export the `router object to enable us use it in another file.
In our index.js file let's import and use our auth.js file and use it.
We do this by inputting the following code in our index.js file
//importing our auth route as auth
const auth = require("./routes/auth");
and
app.use("/api/user", auth);
now our index.js should be looking like this
// import express and mongoose
const express = require("express");
const mongoose = require("mongoose");

//importing our auth route as auth
const auth = require("./routes/auth");

// creates an instance of the express app and save in the app constant
const app = express();

//connect to mongoose

mongoose.connect(
  "mongodb+srv://databaseUser:yourpassword@cluster0.gltnq.mongodb.net/databasename?retryWrites=true&w=majority",
  {
    useNewUrlParser: true,
    useFindAndModify: true,
    useCreateIndex: true,
    useUnifiedTopology: true,
  },
  (err, something) => {
    if (err) {
      console.log(err);
    }
  }
);

//listen for the connection open event
mongoose.connection.on("open", (err) => {
  if (err) {
    console.log(err);
  } else {
    console.log("connected to database");
  }
});

// sets the port to the environment variable PORT but if the variable is not set we use 5000
const port = process.env.PORT || 5000;

// middleware that parses json
app.use(express.json());

// uses the auth route for any request made to the /api/user endpoint
app.use("/api/user", auth);

// a route to / that returns an oject
app.get("/", (req, res) => {
  return res.send({ message: "an auth app " });
});

// listen for requests made to our server on the specified port
app.listen(port, () => {
  console.log(`app listening on port ${port}`);
});
before we go on let's ensure that our routes are working as we want them to work. How do we do that without a frontend ? well we use Postman an api exploration and testing tool.
Testing our routes with the Postman app
In order to test our apis we need either a frontend or a good api testing tool. My preferred tool for this task is Postman. If you don't have Postman installed install it or use the web platform to follow along.
Creating a new request
- click on the + New button on the top right corner
- click on Request
- enter a request name
- scroll down and create a folder / collection
- click on save to request
Adding request detail
- click on the drop down menu with
GETas the default option - select
POSTas that was the verb we used in our route that is, we are making a post request - copy this url localhost:/api/user/signup to enable us route to our
signuproute
Sending the body
click on Body to open the Body tab
click on raw
click on the drop down menu with Text as the default option
select JSON as that is the data format we will be sending
next lets test our api
Before you send any request to your server please make sure your server is still running, if it is lets send a request to our signup route by inputting the data we want to send to our server
into the textbox in the JSON format, which for now is an email, a username and a password.
If it is successful we should get a response from the server saying "signed up"
Saving our user to the database
We can't save our password as it is, we will be needing to encrypt our passwords before it is stored in our database for security reasons.
To do this we will be using a Mongoose middleware or as it is popularly called a pre hook.
Create a new folder called models in the root folder and in this folder create a new file with the name userModel.js which would house our UserSchema.
In the file paste in the following code to create the UserSchema
const mongoose = require("mongoose");
const UserSchema = mongoose.Schema({
  name: { type: String, maxlength: 50 },
  email: {
    type: String,
    trim: true,
    unique: 1,
  },
  password: {
    type: String,
    minlength: 5,
  },
token:{
type: String,
},
});

const User = mongoose.model("user", UserSchema);

module.exports = User;
In the block of code above we do the following:
1). we require Mongoose
2). we create an instance of the mongoose.Schema method passing it an object containing our data types and save it in the UserSchema constant
3). we create an instance of the mongoose.model method passing it a string which will be the name of the model and the schema we created earlier
4). we export the model we created
Before we save our file lets make sure we secure our password by hashing it using bcryptjs a library that helps us hash our password. We will do this with the pre save hook, which is actually a mongoose middleware that is run before our document is saved. we do that with the following lines of code
NOTE: make sure to import bcryptjs at the top of file before copying this code. Like this
const bcrypt = require("bcryptjs");
UserSchema.pre("save", function (next) {
  // do stuff
  let user = this;
  if (user.isModified("password")) {
    bcrypt.genSalt(10, (err, salt) => {
      if (err) {
        return next(err);
      }

      bcrypt.hash(user.password, salt, (err, hashedPassword) => {
        if (err) {
          return next(err);
        }
        user.password = hashedPassword;

        next();
      });
    });
  } else {
    next();
  }
});
NOTE: In the code above this refers to the document that is the new User we are attempting to save.
In the code above we do the folowing:
1). save this as user
2). check if the user we saved earlier has the password modified
3). if it is modified we generate a salt using the bcrypt.genSalt which takes two arguments which are:
a). the iteration count
b). a callback function which uses the salt to hash the password
4). handle any errors that may occur
5). hash using bcrypt.hash method which takes 3 arguments, which are:
a). the string we wish to hash
b). the salt that was generated earlier
c). a callback function
6). save the hashed password to our database
Now our complete userModel.js should look like this
const mongoose = require("mongoose");
const bcrypt = require("bcryptjs");

const UserSchema = mongoose.Schema({
  name: { type: String, maxlength: 50 },
  email: {
    type: String,
    trim: true,
    unique: 1,
  },
  password: {
    type: String,
    minlength: 5,
  },
token:{
type: String,
},
});

UserSchema.pre("save", function (next) {
  // do stuff
  let user = this;
  if (user.isModified("password")) {
    bcrypt.genSalt(10, (err, salt) => {
      if (err) {
        return next(err);
      }

      bcrypt.hash(user.password, salt, (err, hashedPassword) => {
        if (err) {
          return next(err);
        }
        user.password = hashedPassword;

        next();
      });
    });
  } else {
    next();
  }
});

const User = mongoose.model("user", UserSchema);

module.exports = User;
Now that we have configured our UserSchema to hash the password before we save it. Let's go to out auth.js file and make some changes, to allow us to save our user to the database and not just display signed in .
In our auth.js file let's make the some adjustments to our code in our signup route and change it to this :
router.post("/signup", (req, res) => {
  let { email, name, password } = req.body;

  // removing white space from our data using the trim method
  //to enable proper validation

  if (!email.trim() || !name.trim() || !password.trim()) {
    return res.send("fill in correct details");
  }

  const user = new User({ email, name, password });
  user
    .save()
    .then((user) => return res.json({
              message: `${user.name} signed up`
            });)
    .catch((err) => {
      console.log(err.message);
      return res.send(err.message);
    });
});
What we do in the code above is to :
1). ensure the user enters all the required data
2). create a new instance of our User with our data gotten from the user
3). we then save the user to our data base and send the details back to our user
Our auth.js all together should look like this :
const express = require("express");


//creating a new router object from the express global object via the Router method
const router = express.Router();

// route to sign up  that is, it would handle requests to this route that end in /signin
router.post("/signup", (req, res) => {
  let { email, name, password } = req.body;

  // removing white space from our data using the trim method
  //to enable proper validation

  if (!email.trim() && !name.trim() && !password.trim()) {
    return res.send("fill in correct details");
  }

  const user = new User({ email, name, password });
  user
    .save()
    .then((user) => res.send(user))
    .catch((err) => {
      console.log(err.message);
      return res.send(err.message);
    });
});

//route to sign in that is, it would handle requests to this route that end in /signin
router.post("/signin", (req, res) => {
  const { email, password } = req.body;
if (!email.trim() || !password.trim()) {
    return res.send("fill in correct details");
  }
  return res.send("signed in");
});

module.exports = router;
We are now done with our sign up route 🎉🎈 hooray 🎈🎊
Let's build the signin route
Go back to our auth.js file and in the signin route and modify with the following code :
router.post("/signin", (req, res) => {
  const { email, password } = req.body;
  if (!email.trim() || !password.trim()) {
    return res.send("fill in correct details");
  }

  // Load user details from your password DB.

  User.findOne({ email })
    .then((user) => {
      user.validatePassword(
        user.password,
        password,
        function (error, isAMatch) {
          if (error) {
            return res.json(err);
          }
          user.generateToken(user, (err, user) => {
            if (err) {
              return res.json(err);
            }
// storing our user token in a cookie
            res.cookie("urcookie", user.token, {
              maxAge: 90000,
              httpOnly: true,
            });

            return res.json({
              message: `${user.name} signed in`
            });
          });
        }
      );
    })
    .catch((err) => console.log(err));
});
What we do in the code above is to :
1). we check if the user sent in all the correct details
2). we check if the email is in our database and if it is we use the validatePassword method on our user document to check if the password the user sent in is correct
3). if our password is correct then we use the generateToken method on our user document to generate a json token with jwt
4). we store the token we created in a cookie using the name urcookie
5). we return a message to the user saying they have signed in successfully
creating the validatePassword and generateToken methods
The following code would be added to userModel.js :
UserSchema.methods.validatePassword = function (hashedPassword, password, cb) {
  bcrypt.compare(password, hashedPassword, function (err, res) {
    if (err) {
      cb(err);
    }
    cb(null, res);
  });
};

UserSchema.methods.generateToken = function (user, cb) {
  const token = jwt.sign({ id: user._id }, "jwtsecret");

  user.token =token;

  user.save().then((user)=>{cb(null,user)}).catch((err)=>cb(err))

};
What we did in the code above was to :
1). we create the validatePassword method on the document which is a function that uses bcrypt.compare method, to check if the inputed password is the same as the password hashed and saved in the database. This method takes 3 parameters
(i) the inputed password (ii) the hashedPassword (iii) a callback function that sends back the result of the password check
2). we create the generateToken method on the document which is a function that uses jwt.sign method, to generate a token and it takes two arguments
(i) a payload that is, what would be sent to the user (ii) a secret
3). we save the token we created to our database
NOTE: these methods we created would only be available on any document (user) we save to our database and not the Schema method used in creating them
Now our userModel.js should be looking like this :
const mongoose = require("mongoose");
const bcrypt = require("bcryptjs");
const jwt = require("jsonwebtoken");

const UserSchema = mongoose.Schema({
  name: { type: String, maxlength: 50 },
  email: {
    type: String,
    trim: true,
    unique: 1,
  },
  password: {
    type: String,
    minlength: 5,
  },
  token: {
    type: String,
  },
});

UserSchema.pre("save", function (next) {
  // do stuff
  let user = this;
  if (user.isModified("password")) {
    bcrypt.genSalt(10, (err, salt) => {
      if (err) {
        return next(err);
      }

      bcrypt.hash(user.password, salt, (err, hashedPassword) => {
        if (err) {
          return next(err);
        }
        user.password = hashedPassword;

        next();
      });
    });
  } else {
    next();
  }
});

UserSchema.methods.validatePassword = function (hashedPassword, password, cb) {
  bcrypt.compare(password, hashedPassword, function (err, res) {
    if (err) {
      cb(err);
    }
    cb(null, res);
  });
};

UserSchema.methods.generateToken = function (user, cb) {
  const token = jwt.sign({ id: user._id }, "jwtsecret");

  user.token =token;

  user.save().then((user)=>{cb(null,user)}).catch((err)=>cb(err))

};

const User = mongoose.model("user", UserSchema);

module.exports = User;
The entire point of generating a token is that select resources can be protected from unauthorized users. In the next section we will be creating a new route that would be using a middleware to validate users and returning user details to authorized users.
Creating the user detail route
Before we create our user detail route let's create a middleware which verifies our user.
creating middleware
Let's go back to our root folder and create a folder called middleware and in it create a file validateUser.js which would hold the code for user validation.
Input the following code into validateUser.js :
const  User  = require("../models/userModel");

let validateUser = (req, res, next) => {
  let urcookie = "urcookie";
  let token = req.cookies.urcookie;

  User.validateToken(token, (err, user) => {
    if (err) {
      throw err;
    }
    if (!user) {
      return res.json({
        isAuth: false,
        error: true,
      });
    }

    req.token = token;
    req.user = user;
    next()
  });
};


module.exports = validateUser;
What we do in the code above is to :
1). import our User model
2). create a function validateUser that takes three parameters (i) the request object req (ii) the response object res (iii) the next middleware function next
3). we fetch our token and store it in a variable token
4). we call the validateToken which will be stored on our UserSchema. It takes two arguments the token and a callback function
5). we save our token and user in our request object
6). we export our validateUser function
Now let's create our validateToken method
creating validateToken
add the following code to your userModel.js
UserSchema.statics.validateToken = function (token, cb) {
  let user = this;
  jwt.verify(token, "jwtsecret", function (err, decoded) {
    if (err) {
      cb(err);
    }
    user
      .findById(decoded.id)
      .then((UserInfo) => {
        cb(null, UserInfo);
      })
      .catch((err) => cb(err));
  });
};
what we do in the code above :
1). we create our validateToken method on our UserSchema as a function that takes two parameters (i) a token (ii) a callbak function
2). we use the jwt.verify method to verify the token sent in by the user
3). if the token is valid we send the user details to the user
Our userModel.js should now look like this
const mongoose = require("mongoose");
const bcrypt = require("bcryptjs");
const jwt = require("jsonwebtoken");

const UserSchema = mongoose.Schema({
  name: { type: String, maxlength: 50 },
  email: {
    type: String,
    trim: true,
    unique: 1,
  },
  password: {
    type: String,
    minlength: 5,
  },
  token: {
    type: String,
  },
});

UserSchema.pre("save", function (next) {
  // do stuff
  let user = this;
  if (user.isModified("password")) {
    bcrypt.genSalt(10, (err, salt) => {
      if (err) {
        return next(err);
      }

      bcrypt.hash(user.password, salt, (err, hashedPassword) => {
        if (err) {
          return next(err);
        }
        user.password = hashedPassword;

        next();
      });
    });
  } else {
    next();
  }
});

UserSchema.methods.validatePassword = function (hashedPassword, password, cb) {
  bcrypt.compare(password, hashedPassword, function (err, res) {
    if (err) {
      cb(err);
    }
    cb(null, res);
  });
};

UserSchema.methods.generateToken = function (user, cb) {
  const token = jwt.sign({ id: user._id }, "jwtsecret");

  user.token = token;

  user
    .save()
    .then((user) => {
      cb(null, user);
    })
    .catch((err) => cb(err));
};

UserSchema.statics.validateToken = function (token, cb) {
  let user = this;
  jwt.verify(token, "jwtsecret", function (err, decoded) {
    if (err) {
      cb(err);
    }
    user
      .findById(decoded.id)
      .then((UserInfo) => {
        cb(null, UserInfo);
      })
      .catch((err) => cb(err));
  });
};

const User = mongoose.model("user", UserSchema);

module.exports = User;
add the following code to our index.js :
app.get("/userdetails", validateUser,(req,res)=>{
  let { user } = req;
  return res.send(user);
})
In the code above we simply destructure the user object from our request and send it back to our user.
Our index.js should now look like this
const express = require("express");
const mongoose = require("mongoose");
const cookieParser = require("cookie-parser");
const cors = require("cors");

//importing our auth route as auth
const auth = require("./routes/auth");
const validateUser = require("./middleware/validateUser");
// creates an instance of the express app and save in the app constant
const app = express();

//connect to mongoose

mongoose.connect(
  "mongodb+srv://botanicalCoder:mongopassword@cluster0.gltnq.mongodb.net/boilerplateyoutube?retryWrites=true&w=majority",
  {
    useNewUrlParser: true,
    useFindAndModify: true,
    useCreateIndex: true,
    useUnifiedTopology: true,
  },
  (err, something) => {
    if (err) {
      console.log(err);
    }
  }
);

//listen for the connection open event
mongoose.connection.on("open", (err) => {
  if (err) {
    console.log(err);
  } else {
    console.log("connected to database");
  }
});

// sets the port to the environment variable PORT but if the variable is not set we use 5000
const port = process.env.PORT || 5000;

// middlewares
app.use(express.json());
app.use(cookieParser());
app.use(cors());

app.use("/api/user", auth);

// a route to / that returns an oject
app.get("/", (req, res) => {
  return res.send({ message: "welcome to the auth app " });
});

app.get("/userdetails", validateUser, (req, res) => {
  let { user } = req;
  return res.send(user);
});

// listen for requests made to our server on the specified port
app.listen(port, () => {
  console.log(`app listening on port ${port}`);
});
Since we have a sign in route it is only right we create a sign out route to log off our users.
creating a sign out route
At the top of our auth.js route import our validateUser.js file like this
const validateUser = require("../middleware/validateUser");
to enable use the middleware input the following code
router.get("/signout", validateUser, (req, res) => {
  res.cookie("urcookie",{maxAge: 0});
  User.findByIdAndUpdate(req.user._id, { token: "" })
    .then((user) => {
      return res.send("you've signed out");
    })
    .catch((err) => res.send(err));
});
In the code above we :
1). we delete our cookie by setting it's maximum age to 0 that is, it expires
2). we find our user document and delete the token we stored earlier
3). we send a message to the user saying "you've signed out"
Our `auth.js file should look like this now
const express = require("express");
const validateUser = require("../middleware/validateUser");
const User = require("../models/userModel");

const router = express.Router();

router.post("/signup", (req, res) => {
  let { email, name, password } = req.body;

  if (!email.trim() || !name.trim() || !password.trim()) {
    return res.send("fill in correct details");
  }

  const user = new User({ email, name, password });
  user
    .save()
    .then((user) =>
      res.json({
        message: `${user.name} signed up`,
      })
    )
    .catch((err) => {
      console.log(err.message);
      return res.send(err.message);
    });
});

router.post("/signin", (req, res) => {
  const { email, password } = req.body;
  if (!email.trim() || !password.trim()) {
    return res.send("fill in correct details");
  }


  User.findOne({ email })
    .then((user) => {
      user.validatePassword(
        user.password,
        password,
        function (error, isAMatch) {
          if (error) {
            return res.json(err);
          }
          user.generateToken(user, (err, user) => {
            if (err) {
              return res.json(err);
            }


            res.cookie("urcookie", user.token, {
              maxAge: 90000,
              httpOnly: true,
            });

            return res.json({
              message: `${user.name} signed in`,
            });
          });
        }
      );
    })
    .catch((err) => console.log(err));
});

router.get("/signout", validateUser, (req, res) => {
  res.cookie("urcookie",{maxAge: 0});
  User.findByIdAndUpdate(req.user._id, { token: "" })
    .then((user) => {
      return res.send("you've signed out");
    })
    .catch((err) => res.send(err));
});

module.exports = router;
Hooray🎊🎉 hooray🎊🎉 We have successfully created our user authentication app. I hope you were able to learn a thing or two. The complete code is found in this repo
Bonus how to use a git hub repo as your template
For this we will be using the web interface of git hub
follow the steps below to use a template repo today
1). search for the template repo
2). click on use this template
and you're good to go